Milesight PTZ - SFTP Setup
These instructions guide you through configuring your camera to securely send images to Beacon using SFTP.
Prerequisites
Before you begin, make sure you have:
- Access to your camera web interface
- Your Camera Endpoint Username and Password from the Beacon dashboard
- Your device name or manual device ID from Beacon
Step 1: Log in to the camera
- Log in to your camera through its web interface.
- Click the gear icon to open Settings.

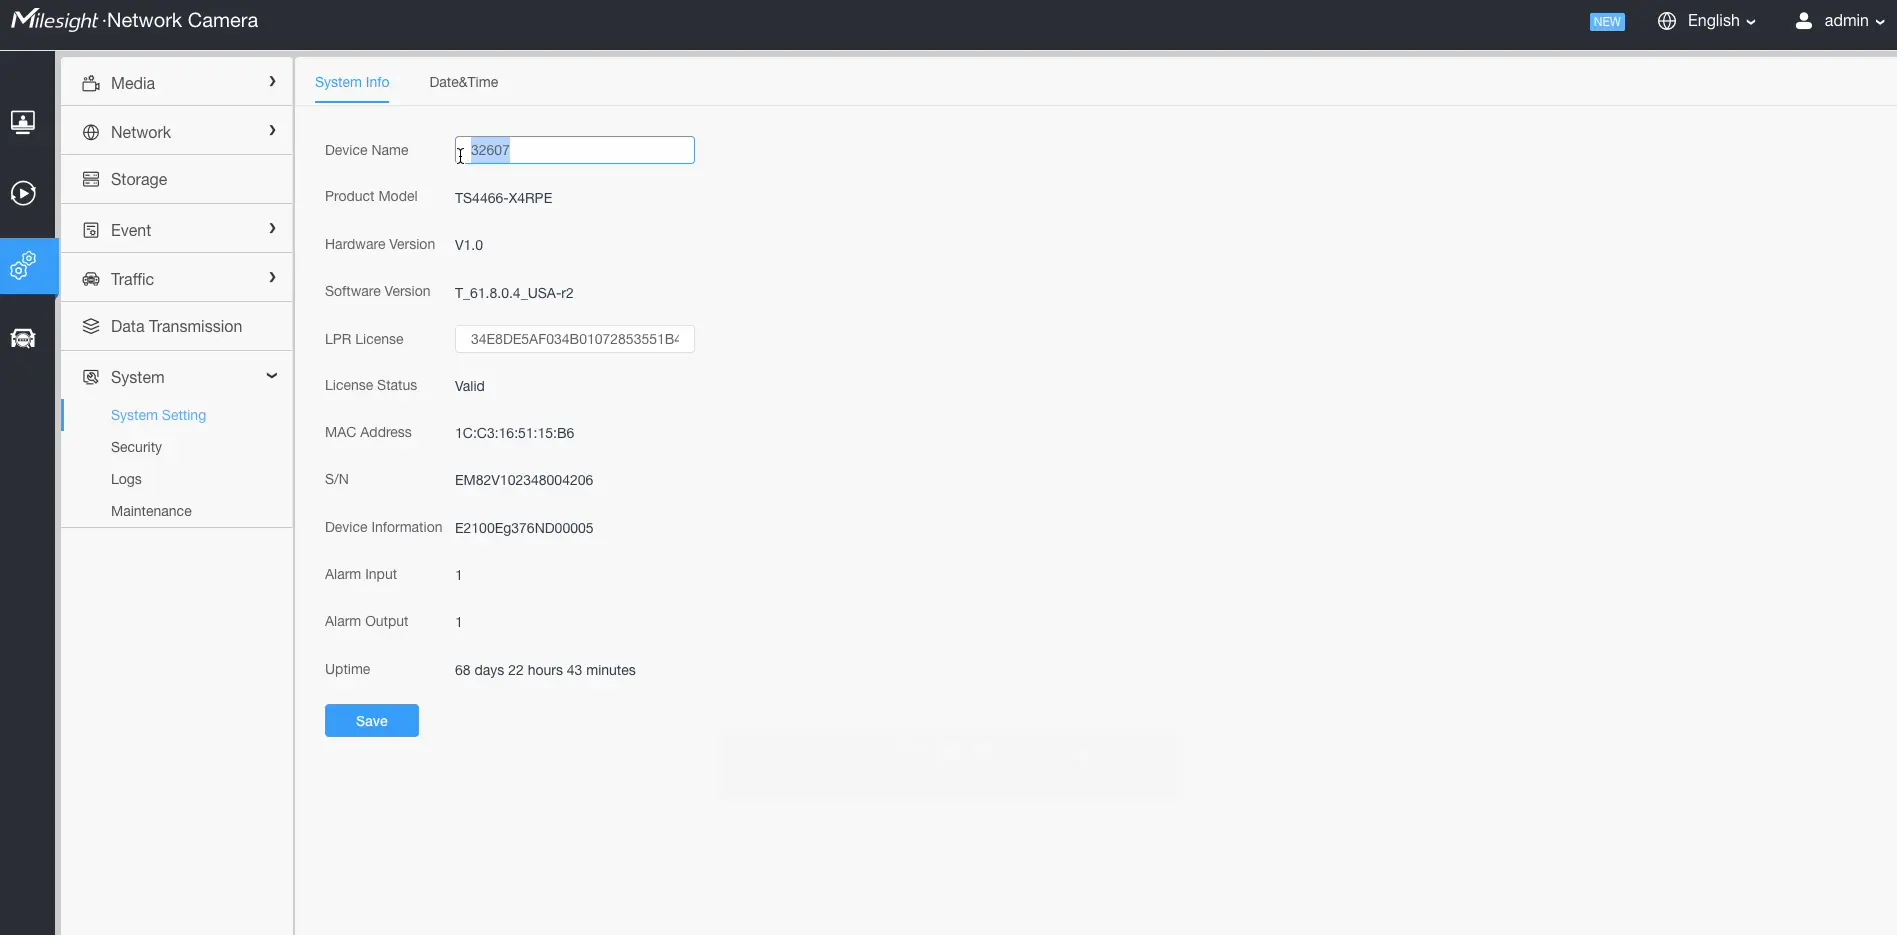
Step 2: Configure the device name
- In the settings menu, select System.
- Click System Settings.
- Open the System Info tab.
- Enter the Device Name.
Device name rules:
- Must not contain spaces
- Must exactly match the device name or manual device ID used in Beacon
- Click Save.
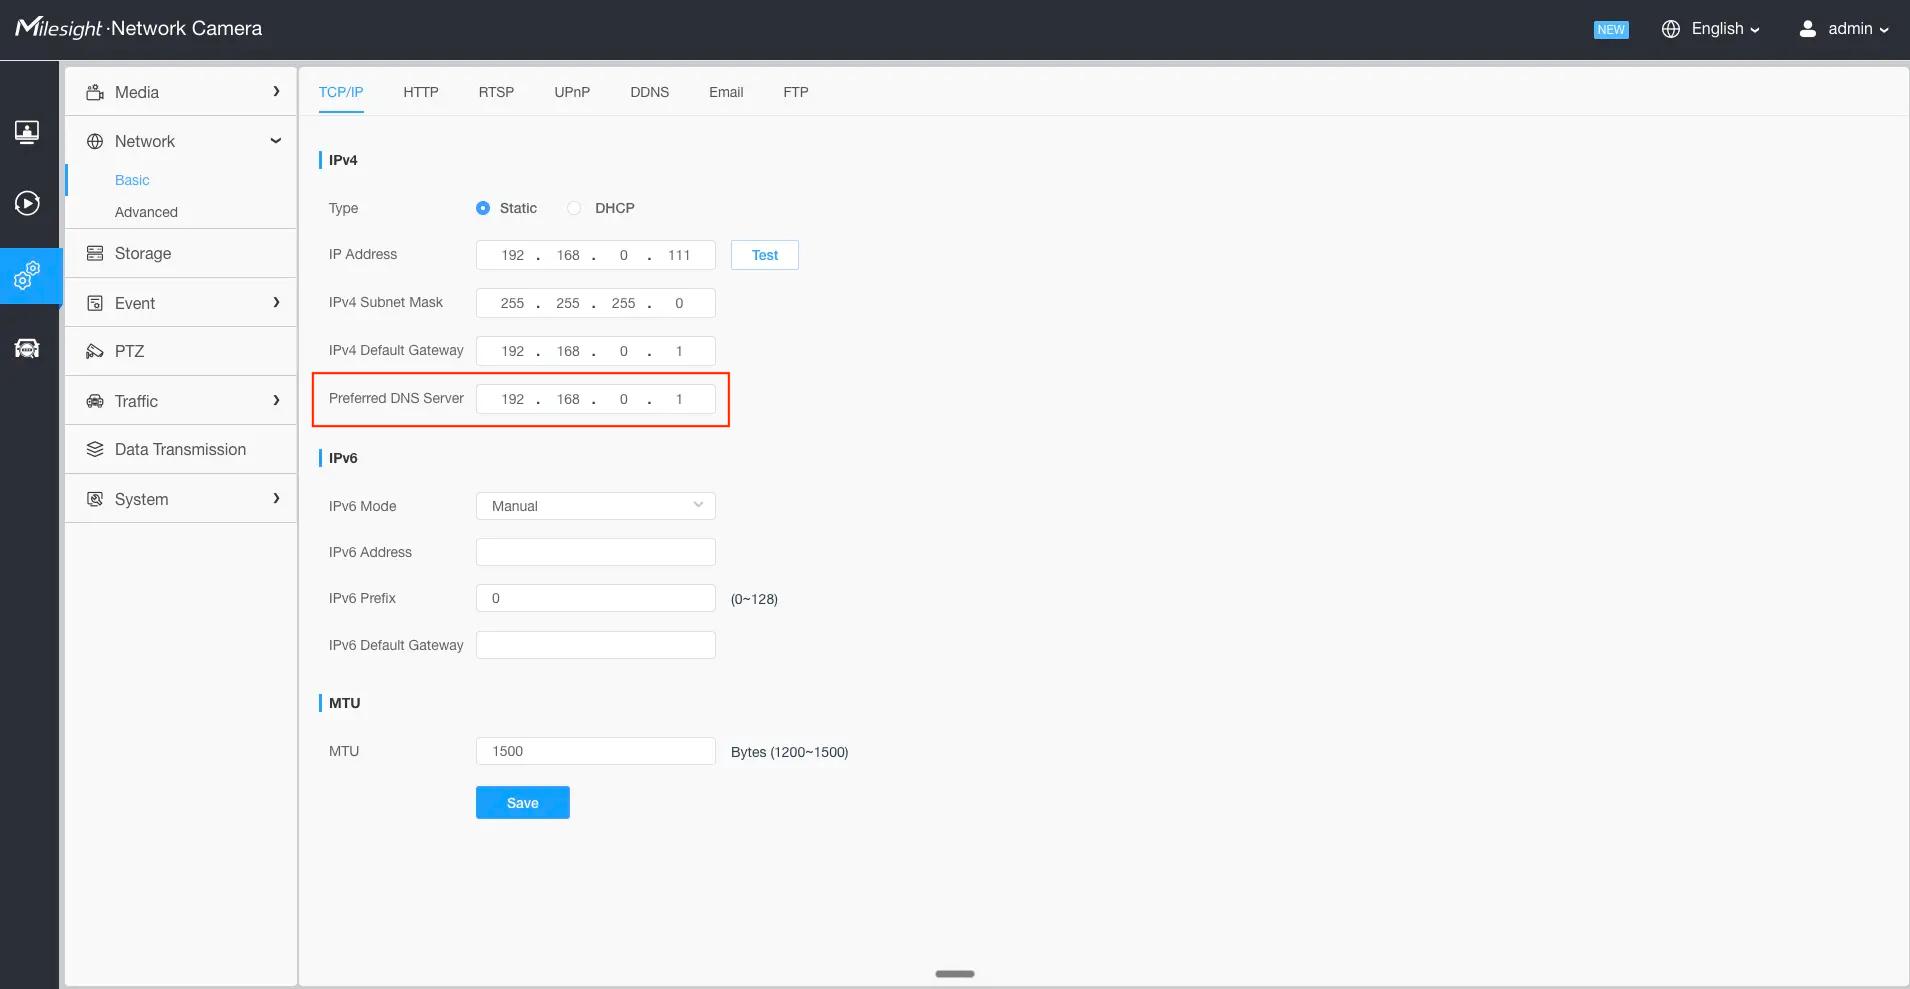
Step 3: Configure TCP/IP
- Configure the Preferred DNS Server
- Default is
8.8.8.8- If the device is using a Verizon router, change Preferred DNS Server to
192.168.0.1
- If the device is using a Verizon router, change Preferred DNS Server to
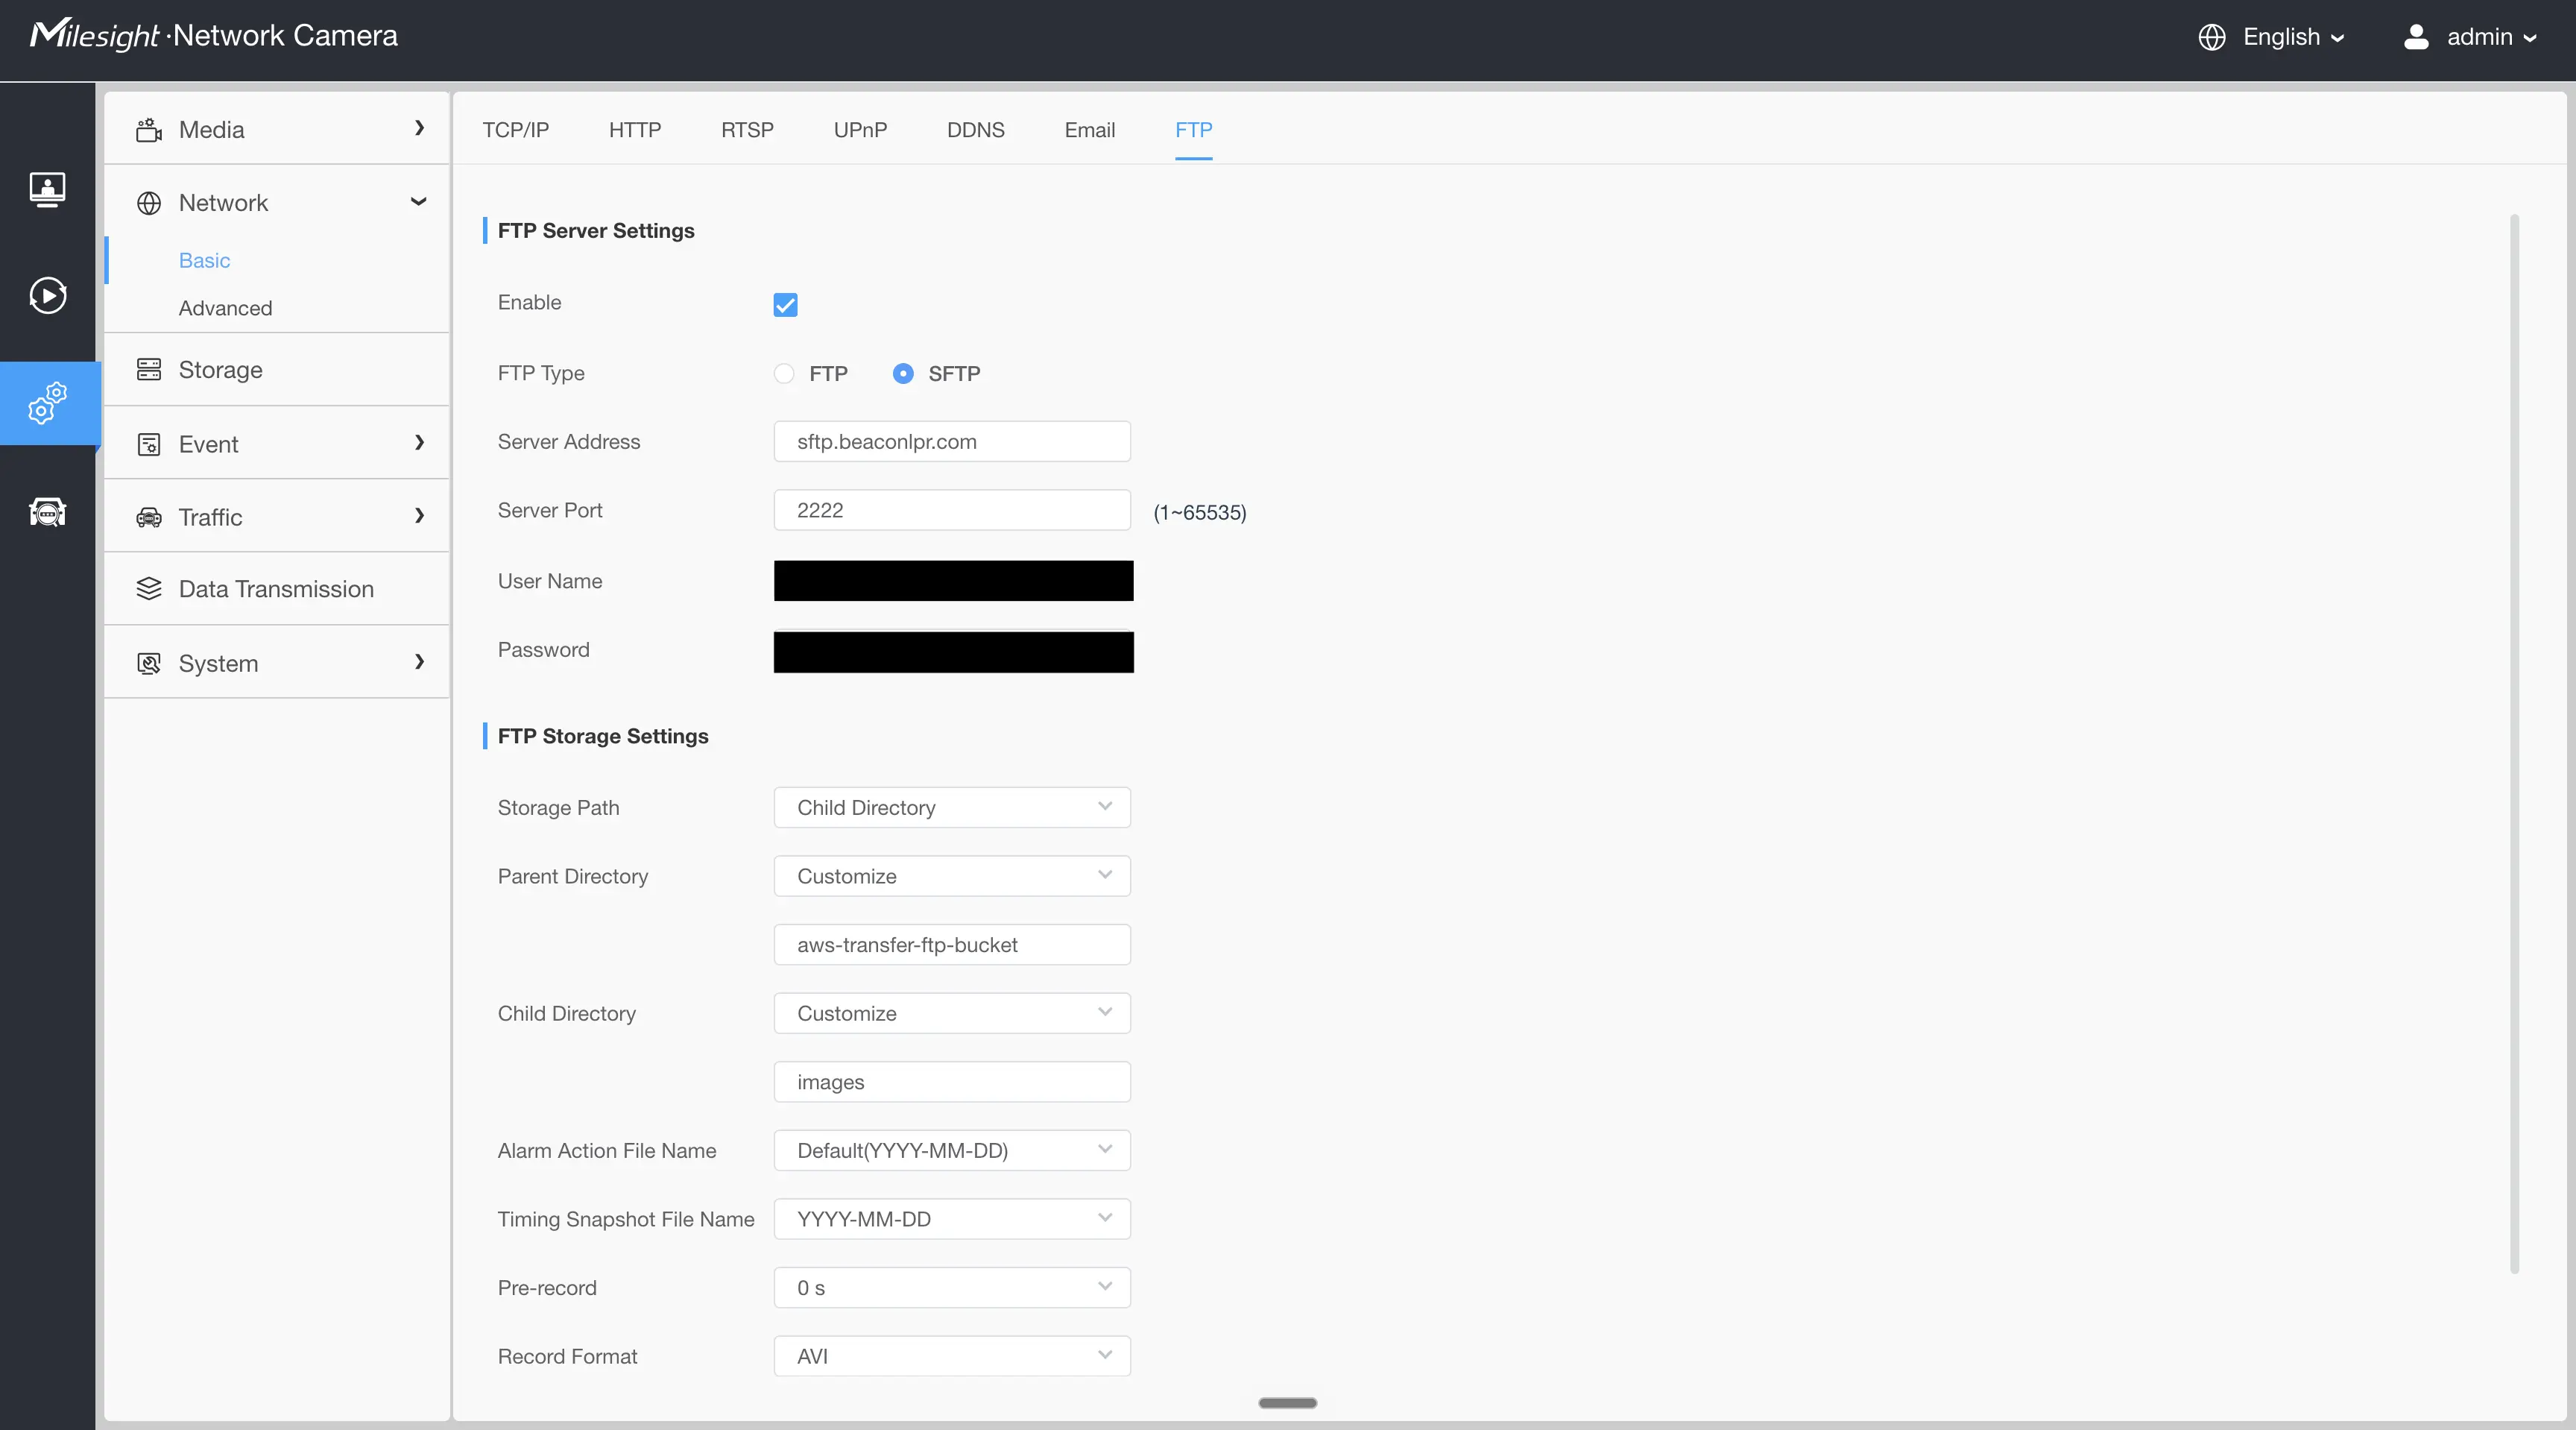
Step 4: Configure FTP Storage Settings
Under FTP Storage Settings:
- Enable the FTP Server Settings
- Select
SFTPfor FTP Type - Enter
sftp.beaconlpr.comfor Server Address - Enter
2222for the Server Port - Enter your camera username and password from your Beacon Organization settings page
- Set Storage Path to Child Directory
- Enable Customize for the parent directory and enter:
aws-transfer-ftp-bucket
- Enable Customize again and enter:
images
- Leave all remaining settings at default values
Step 5: Configure snapshot File Name
- Select the Traffic page
- Select the LPR page
- Select the advanced tab at the top of the web page
- Under the Snapshot file name select the settings shown in the image below
- Separator _
- Plate
- License plate
- Plate Type
- Others
- Time
- Device ID
- The items of the file name need to be in the following order
- Time YYYY-MM-DD
- Device ID (enter the device ID given by Beacon)
- License plate
- Plate type
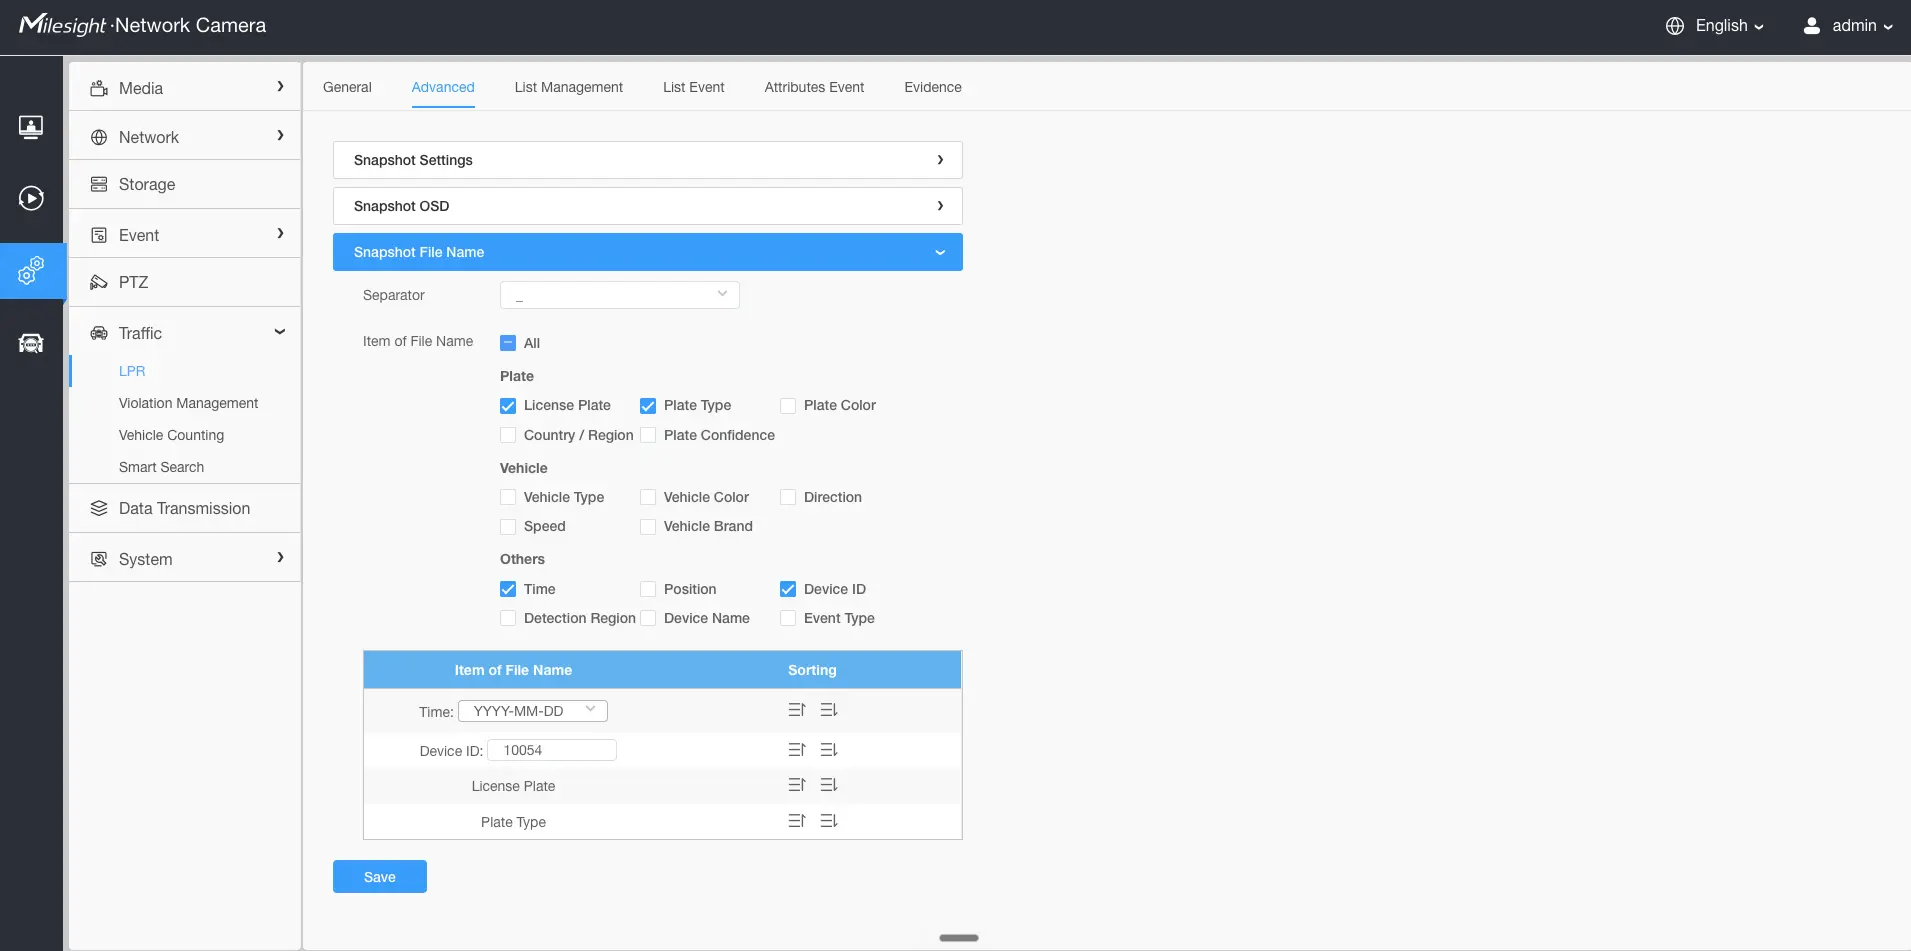
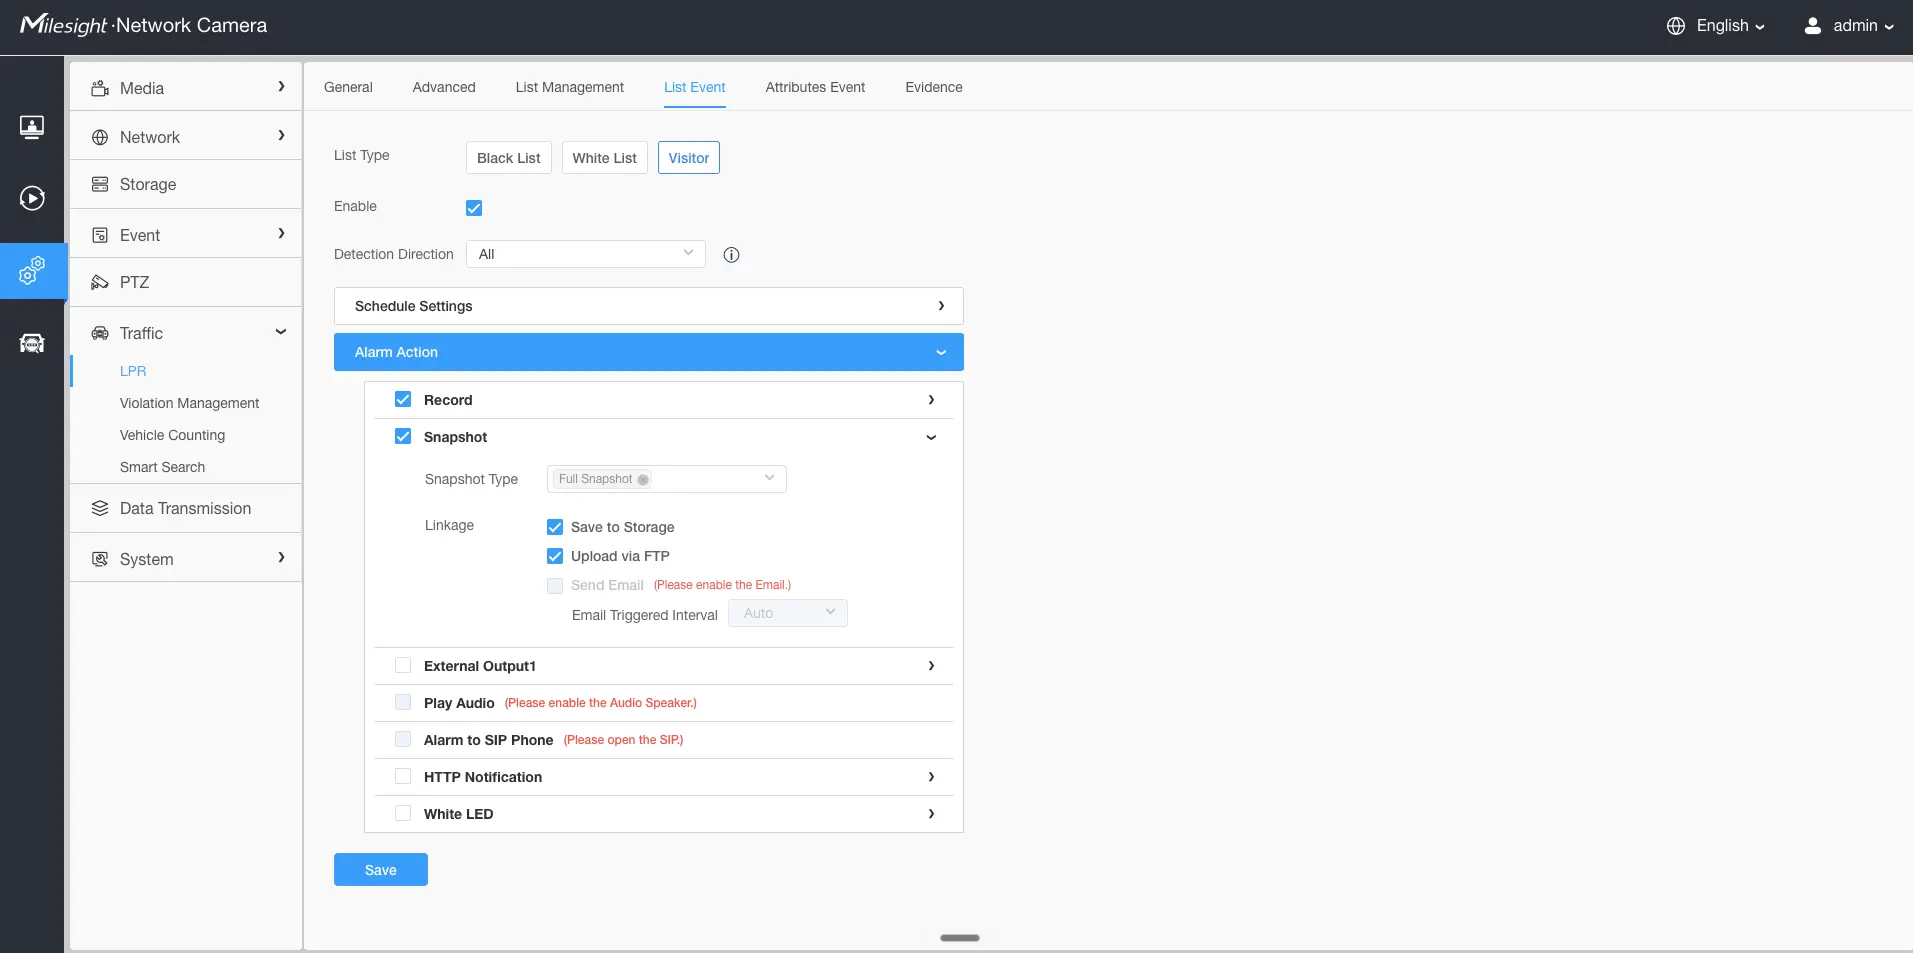
Step 6: Configure Alarm Action
- Select the List Event tab
- Select Visitor as your List type
- Check the snapshot box
- Select Full Snapshot for Snapshot Type
- Under Linkage select the following
- Save to Storage
- Upload via FTP